Express Shipping
Brother Knitting Machine Tips: How to Perfectly Cast On Your Knitting
Embarking on your knitting journey can often seem daunting, especially when your tool of trade is the Brother knitting machine. Yet, in reality, mastering the primary operations like casting on can be simpler than you would think. Let's delve into the process of casting on, breaking it down into manageable steps to help you get started.
"Knitting with a Brother knitting machine isn't just about the end product. It's about the rhythm, the motion, and the great sense of accomplishment you feel when the fabric gathering- just below the needles- starts to grow."
What Do You Need to Start?
Before you can cast on using the Brother knitting machine, ensure you have prepared the following items:
- A Brother Knitting Machine: There are many models of Brother knitting machines available - choose the one that suits your needs best.
- Yarn: Brother knitting machines work with a variety of yarn types and weights. Select a yarn that is suitable for your project and compatible with your machine.
- Knitting Machine Needles: These should come with your Brother knitting machine, all set in their default position.
- Weight Hangers: These are important tools for knitting machine operation, providing the necessary tension to ensure your knitting comes out correctly.
In the coming sections, we'll walk you through the process of casting on with your Brother knitting machine. So, get your knitting paraphernalia ready, and let's journey into the wonderful world of machine knitting!
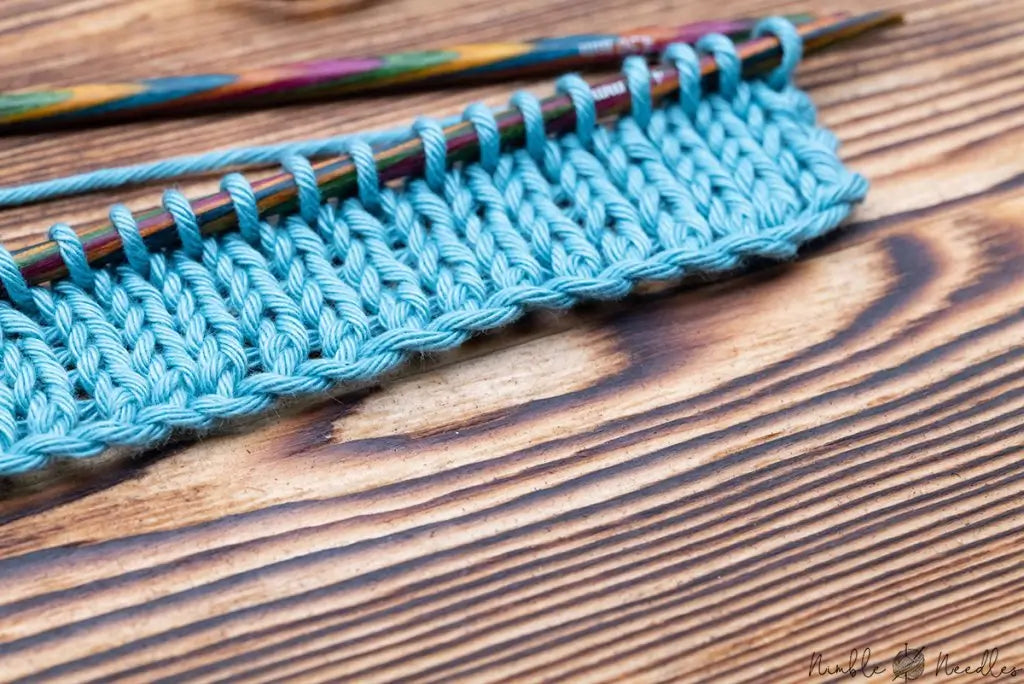
Understanding the Basics: What is Casting On in Knitting?
Casting on refers to the process of creating the initial row of stitches on your knitting machine. These stitches form the foundation or "cast on" of your knitted piece. It's not just setting up the stage for your knitting but also determines the ease at the end of your project. If you're too tight, it could lead to a non-flexible edge, while an overly loose cast on might create a loose and unappealing end product. As such, it's a critical aspect of knitting that needs some deftness and practice.
With a Brother Knitting machine, casting on takes a different twist from the traditional needle knitting. The mechanical setup of this machine allows for a smooth, speedy and consistent casting on process. It translates to less time knitting and more time enjoying your beautiful creations.
The ability to cast on correctly with a Brother Knitting machine is a skill that will significantly elevate your knitting experience and the final output.
Navigating the Process: How to Cast On With a Brother Knitting Machine
Now, let's dive into the step by step guide to casting on with a Brother Knitting machine.
Step 1: Set-Up Your Brother Knitting Machine
The first thing you'll need to do is to properly set-up your Brother Knitting machine. This includes attaching the yarn to the feeder and winding it around properly. Make sure that the carriage is moved to the right to start the knitting process.
Step 2: Engage the Appropriate Knitting Settings
Depending upon the kind of stitches you want to knit, you'll need to choose the right machine settings. If it's your first time, then start with the basic setting for plain knitting. On your Brother machine, this is usually represented as P/S.
Step 3: Placing the Yarn and the Starter
Now, pass the yarn through the tension mast and then through the carriage. Also, attach the initial hem or starter if you are using one.
Initiating the Cast-On Process
Step 4: Start Knitting
Once everything is set, push the carriage gently from right to left. This will knit the first row. You've started casting on. The next few strokes will vary based on the kind of stitch you're using.
Step 5: Continue Knitting
Keep knitting by moving the carriage back and forth until you reach the last stitch. This should result in a neat row of knitted yarn on your machine.
Finalising the Cast-On
Step 6: Remove The Hem
Once your row is complete and you have achieved the desired amount of stitches, it's time to remove the initial hem, completing the cast-on process and leaving you ready to start truly knitting. This process sets the foundation for your knitting project, so take your time and don't rush.
In conclusion, casting on with a Brother knitting machine is a simple and efficient process. Practice makes perfect—keep trying, and eventually, it'll feel like a breeze!
Are there different methods for casting on knitting with a Brother machine?
Yes, indeed! The wonderful world of knitting with a Brother machine opens up a myriad of casting-on methods to experiment with. Remember, the perfect cast-on method varies depending on your knitting project. Let’s delve into a few methods you could give a whirl.
The E-Wrap Method
Popular for its simplicity, the E-wrap is great for beginners. An 'E' is formed when you wrap the yarn around each needle.
- After threading your machine, hold the yarn and wrap it around each needle in an ‘E’ or ‘cursive lowercase E’ shape.
- Push the carriage across to knit the first row. The E-wrap cast on is now complete!
The Double E-Wrap Method
This method is a variation of the first one, used primarily to create a looser edge.
- Wrap the yarn twice around each needle, creating two 'E' shapes.
- Once done, push the carriage across. Congratulate yourself as you've successfully completed the double E-wrap cast on!
The Automatic Cast-On Method

As the name suggests, this method gets your Brother machine to do all the work. It’s perfect when you prefer automatic operations.
- You will need a Brother garter carriage set up on your knitting machine
- Then, simply activate the garter carriage following the instructions and let your knitting machine and garter carriage take over from there. It's as simple as that!
Each method holds its own charm and utility, so don’t shy away from trying out different styles to figure out what works best for your knitting projects. It might take a little experimentation, but that's half the fun, isn't it?
Remember, practice makes perfect. So, thread that yarn, get your Brother machine ready, and let the casting on commence!
Leave a comment